
Are you tired of staring at those unsightly scratches, dents, and cracks on your floors? Worry no more! A floor repair kit might just be the solution you’ve been searching for. This comprehensive guide will take you through everything you need to know about floor repair kits, from what they are and how they work to how to choose the best one for your needs.
Flooring is one of the most significant aspects of any home, office, or commercial space. Over time, even the most durable floors can suffer from wear and tear. Scratches, dents, and cracks not only detract from the aesthetic appeal but can also lead to further damage if not addressed promptly. Enter the floor repair kit – a handy solution that can restore your floor’s beauty and functionality without the need for costly replacements.
What is a Floor Repair Kit?
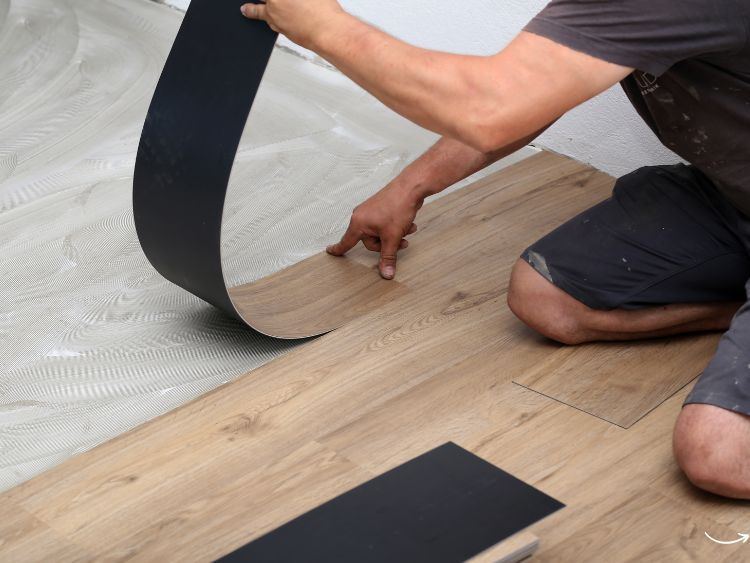
A floor repair kit is a set of tools and materials designed to fix minor damages on various types of flooring. Whether you have hardwood, laminate, vinyl, or tile floors, there’s a repair kit out there for you. These kits typically include items like putty, wax sticks, markers, sandpaper, and other tools necessary for repairing and blending the damaged area with the rest of the floor.
Types of Floor Repair Kits
- Hardwood Floor Repair Kits: These usually contain wood putty, wax filler sticks, and color-matching markers. They are perfect for fixing scratches, gouges, and small holes.
- Laminate Floor Repair Kits: These kits often include a compound that can be mixed to match the color of your laminate flooring. They work well for chips and scratches.
- Vinyl Floor Repair Kits: Typically contain a special adhesive and color-matched repair compounds to address cuts, gouges, and burns.
- Tile Floor Repair Kits: These kits come with epoxy-based fillers and colorants to repair cracks and chips in ceramic or porcelain tiles.
Benefits of Using a Floor Repair Kit
Using a floor repair kit offers several advantages:
- Cost-Effective: Repair kits are significantly cheaper than replacing entire sections of flooring.
- DIY Friendly: Most kits are designed for ease of use, allowing homeowners to perform repairs without professional help.
- Time-Saving: Repairs can be completed quickly, restoring your floor’s appearance in no time.
- Versatile: Suitable for various types of flooring and different kinds of damage.
How to Use a Floor Repair Kit
Let’s dive into the step-by-step process of using a floor repair kit. While the exact steps may vary depending on the type of kit and flooring, the following guide covers the basics.
Step 1: Clean the Area
Before starting any repair, ensure the damaged area is clean and free from debris. Use a damp cloth to wipe away dust and dirt, and let it dry completely.
Step 2: Prepare the Repair Material
For kits that require mixing, follow the manufacturer’s instructions to prepare the repair compound. This might involve blending different colors to match your floor perfectly.
Step 3: Apply the Repair Compound
Using the tools provided in the kit, apply the repair compound to the damaged area. For scratches and small dents, use a wax stick or filler. For larger holes or cracks, use putty or an epoxy filler.
Step 4: Smooth and Blend
Once applied, smooth the repair compound using a putty knife or a similar tool. Blend the edges with the surrounding floor to ensure a seamless finish.
Step 5: Let It Dry
Allow the repair compound to dry completely. This could take anywhere from a few hours to overnight, depending on the product used.
Step 6: Finish Up
If necessary, sand the repaired area lightly to ensure it’s flush with the rest of the floor. Use color-matching markers or paints to blend the repair further, if required.
Choosing the Best Floor Repair Kit
When it comes to selecting the right floor repair kit, consider the following factors:
Type of Flooring
Ensure the kit is designed for your specific type of flooring. Using the wrong type of kit can lead to unsatisfactory results and further damage.
Color Matching
Look for a kit that offers a variety of color options or custom mixing capabilities to match your floor accurately.
Ease of Use
Opt for kits that come with clear instructions and all necessary tools. Kits that are too complicated might end up being more trouble than they’re worth.
Reviews and Recommendations
Check online reviews and ask for recommendations from friends or professionals. A well-reviewed kit is likely to deliver better results.
FAQs
Q1: Can I use a floor repair kit on deep gouges?
Absolutely! Some repair kits are specifically designed to handle deep gouges and holes. Look for kits that include putty or epoxy fillers.
Q2: Are floor repair kits permanent fixes?
While floor repair kits provide durable repairs, they may not be as permanent as professional repairs or replacements. However, they can significantly extend the life of your flooring.
Q3: Can I repair tiles with a floor repair kit?
Yes, there are specialized tile repair kits available that can fix cracks and chips in ceramic and porcelain tiles.
Q4: How long does it take for the repair to dry?
Drying times vary depending on the product used. It can take anywhere from a few hours to overnight.
Q5: Are floor repair kits eco-friendly?
Many floor repair kits are designed to be eco-friendly, using non-toxic materials. Check the product details for more information.
Summary
Floor repair kits are a practical, cost-effective solution for addressing minor damages to your flooring. Whether you have hardwood, laminate, vinyl, or tile floors, there’s a kit that can help you restore your floor’s appearance and extend its lifespan. By following the steps outlined in this guide and choosing the right kit for your needs, you can tackle floor repairs with confidence and ease.
Authoritative Links
- Home Depot: www.homedepot.com
- Lowe’s: www.lowes.com
- Floor Repair Kits: www.floorrepairkits.com
- DIY Network: www.diynetwork.com
- This Old House: www.thisoldhouse.com
Remember, keeping your floors in top condition not only enhances the beauty of your space but also maintains its value. So, grab a floor repair kit and give your floors the TLC they deserve!